Pages

Thursday, February 2, 2012

Spraypainting Curtain Rods and DIY Tablecloth into Curtains

I looked and looked all over the blogisphere for something to do with my 3 HUGE windows in our living, dining and kitchen. I did find a lovely tablecloth at Target that I was going to split in half for each curtain. I didn't want them too full and I didn't want to close them as we just pull our blinds down each night instead.

I was able to purchase 3 tableclothes at $19.99 each and split them down the middle. I then sewed a very basic seem down the side I cut and hung them with clips purchased from Wal-Mart.I purchased 4 bags at $7 each so those were quite costly.
I was able to get 3 curtain rods for $7 each at The Christmas Tree Store and sprayed them with ORB (oil rubbed bronze) spray paint which was $6 at Lowes.


The total project cost was:
Curtains: $60.00
Clips: $28.00
Curtain Rods: $21.00
Spray Paint: $6.00


Total: $115.00 for three HUGE windows that run the length of my house.

Tuesday, January 31, 2012

Pink and Yellow Ikea Klippan Dyed Couch Slipcovers + a Tutorial

We have two Ikea couches and absolutely LOVE our Klippans. We have the 4 seater Klippan sofa and absolutely adore it. We also love it and that the natural covers are pretty cheap at times to purchase. You can see the pink cover we dyed lying on the chair behind the 4 seater couch.


We also have the Klippan loveseat 2 seater.  We originally purchased one and dyed it pink for my daughter's birthday. This is truer to the color than the picture above of our pink cover. This was using 2 bottles of Fuchsia on the 2 seat loveseat cover.

We also wanted to dye a cover dark gray but didn't/couldn't find any black in liquid form at the time and used the powdered gray. It totally didn't work out well. You can see in the picture from this post HERE from last time we talked about dying that it looked too blue.

Well, we bleached that one with a gallon of bleach and lots of rinse water in the bath tub.
We rinsed and rinsed the cover and even did a quick wash in the washing machine to make sure there was no residue of bleach left to mess with our new color.
Then we put two bottles of golden yellow and 1/2 a bottle of sunshine orange into the water.
We then put our freshly washed cover into the water and let it soak. We constantly came back and moved the fabric around to ensure it was all covered with dye.
This picture doesn't do it true justice but we LOVE it with our new curtains and curtain rods.


So now we have a dark gray couch and a yellow loveseat and we just LOVE them both!

Thursday, January 26, 2012

Bible Cake for Pastor's Birthday


My grandfather's 84th birthday was yesterday. We had a fabulous church service last night in honor of him and took a 50 question quiz on how well you know your pastor. I only missed 9 which isn't bad since he is also my grandfather.

I made this cake last year for his 83rd birthday and found the pictures today when I began making our 2011 year in pictures book. I also realized that I never shared this awesome cake on the blog. And so... today's post was born.

I began by making a large yellow cake in two rectangular pans. I cut the edges so they would form more of a page look and slid them together on my cake stand.
I made some great homemade chocolate icing and put a layer of coconut beneath it. My grandfather loves German sweet chocolate cake so I pulled a little coconut influence from that.
I covered the entire thing in white fondant and began painting. I took gel food coloring in ivory and gold and brushed the entire surface. I then created edges to resemble a book and painted a darker tone.
Do you just love how I steal my child's plastic plate as a palette? Me too!

I added a good Bible verse my grandfather likes and some leaf and ribbon detailing. I also purchased a plain white gumpaste cross from the local cake supply store and painted it up. Somehow I got so wrapped up that I totally forgot to take pictures of the process.
I covered the entire cake in gold luster dust to give it a little extra sheen. This picture was taken in my fridge after I finished the cake.
Happy Birthday Grandpa! May you have many many more!

Monday, January 23, 2012

Autumn/ Fall Themed Child's Birthday Party

I am tremendously late in posting my youngest child's birthday. Her birthday is October 12th and we had our party the 16th. 3 months late isn't bad right? Thanks, I feel better now.

This was my attempt at taking pictures for her invitation. It didn't work out well and I used an adorable picture of pumpkins instead. She has the worst "fake" smile but she's still cute anyway. At least I think so.

I bought hay bales from our local nursery and used three on my porch and three to tear apart for the hayride.

I made orange/vanilla cupcakes with orange infused butter cream frosting. I got the cupcake wrappers from Michael's. I totally forgot to take a picture of the food table but at least I got the cupcake table. Honestly, isn't it only the desserts that matter anyway? :o) I thought so too!

I purchased a vinyl birthday banner to use year after year for both girls. Here is Eryn's. It is quite large at over 3 feet long.

The handmade blocks were done by my mother. She made the bottom block double sided with my other daughter's name on it so we can just turn them around. She hasn't set up an official shop anywhere yet but if you want to send me an email I can get prices and info. I do know that they are wood and she hand paints, sands and decorates each block.
 
She made these cute blocks for her birthday to sit on her shelf. Eryn just loves princesses and requested these blocks.


The hayride was the trailer pulled by my father in law. My husband and brother rode along as chaperones. The hayride went just around our development which is a private area so all parties involved were totally safe as only one major road goes out into the town and all the rest are just quiet little streets with no exit to the main road.

The kids loved it, especially Eryn.
Her older sister liked the ride as well.
After she opened presents and cards she dressed up in a Disney princess dress just because so she could eat her cupcake.
She had some difficulties using the gloves to eat her cupcake but she eventually just took them off.

All in all her party was a success. She put back on her party dress in the end and took a few pictures with her baby doll on the front porch.

Saturday, January 21, 2012

Vegetarian Shepherd's Pie with Boca Soy Crumbles


My family and I watched a great documentary called "Vegucated" and I honestly wanted to cry. A few times I did in fact cry and so did my 2nd grade daughter who insisted on watching with me. I had long known that animals were killed for food, what person doesn't? But what I didn't know was just how cruelly animals were kept and treated.

I began my journey into "vegetarianism" by listening to my own body. I have horrible energy swings, headaches, feel tired and groggy, get tummy troubles, etc. I seem to have issues with lots of foods. What food was it? Who knows? I know that I couldn't sleep at night all night because I couldn't breathe. Was it my allergies? Maybe. I do have two dogs and two cats but getting rid of them was not an option. I love my animals but I also love to breathe. I had read that dairy causes more mucus production so I thought maybe getting rid of dairy would help my breathing issues at night. Can I give up milk and yogurt? Sure! Can I give up cheese? Maybe not. Cheese is a staple in my home and is used multiple times a week for a majority of meals.

My husband and youngest daughter are total meat eaters. My youngest LOVES her chicken nuggets and will eat meat over anything else. My husband looked at me when I said I wanted us to give up meat and flat out said "no". I am slowly convincing him by switching out our meat for soy substitutes for 2-3 meals a week. We still have some beef and pork in the freezer to use up and it would be horrible to throw it away especially since the animal's life has already been forfeit but I have purchased Boca and Morningstar Farms products and soy milk to get us started. Believe it or not, the youngest meat eater LOVES her 25% less sugar Westsoy Plus Plain soy milk! She asked for it twice today and she NEVER asks to drink milk. Yeah!

This recipe I found at Peta's website in their pdf version of the "getting started" Vegetarian information packet.

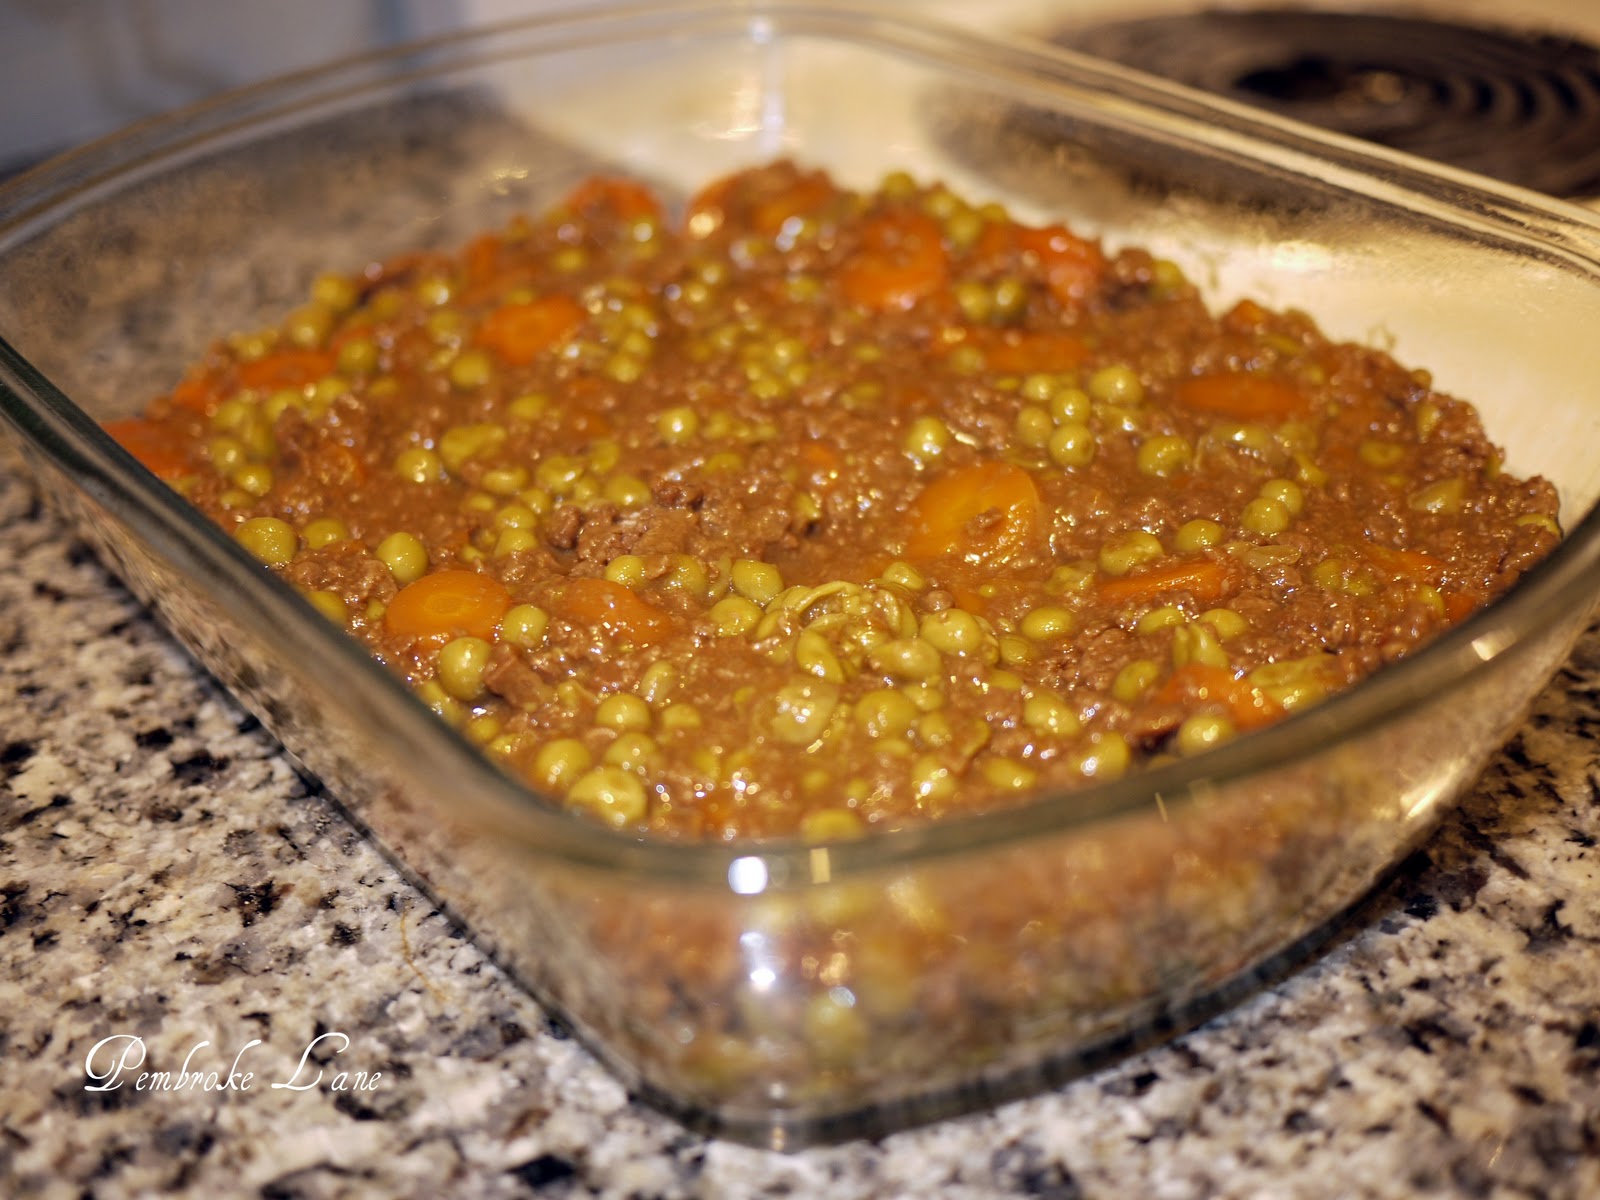
I mixed together:

1 can of peas
1 can of carrots
1 packet of gravy (made to serve)
1 bag of Boca Soy Crumbles

and spread into a sprayed glass dish

Wash, peel, and boil for 20 minutes 4-6 medium potatoes.

Mash with 1/2 cup of soy or regular milk
2 Tb of margarine or real butter
Salt & Pepper to taste
1 tsp Garlic Salt

Spread on top of mixture and bake at 350 degrees for 20-30 minutes until potatoes are slightly brown.

*This recipe differs slightly from the PETA recipe as I doubled the amount of veggies and added two potatoes.

Of course mine does not look nearly as pretty as PETA's version as I believe I pulverized my potatoes but my family still ate it and my husband even went back for seconds! I also had a little gravy sneak out on the side (bad gravy).

Monday, January 16, 2012

Birthday Present preview

Sorry about the raw picture but I am posting this from my phone. We are dinner at my mother's house this evening and she asked me to check out my birthday presents in case I didn't like them. My birthday isn't until February 4th but she wanted to make sure she didn't have to do any exchanges. One of the the things she found for me I just had to take a picture of and daydream about where to put it. You see, she found an amazing white elephant at Marshall's. The store clerk told her it was the only one they had gotten in and they had and had just put it out. Yeah me! Look for our favorite new pachyderm when my birthday rolls around. I'm sure he will be featured lots in the future.

Saturday, January 14, 2012

Labeled Glass Pantry Jars & a Vinyl Transfer Tutorial

I love all things labeled and pretty. If I had more time to a day I'd have everything labeled in my entire life but alas my OCD must go untapped since there are only 24 hours in a day and I need to sleep some time, or so my husband says.

I originally had these Tupperware organizers but wanted a more sleek, updated look where I could clearly see when I needed more ingredients instead of the little peak a boo window.

I found these great glass jars at Target. The largest ones (they hold a gallon) are a little under $6, the medium size around $5 and the small ones are under $5. I purchased a bunch of each a little at a time each week. Yeah, I totally go to Target every week! I LURVE Target just a little! Oh and I got those blue cups for our camping trips for around $2 on clearance! Score!

I washed the jars and let them dry thoroughly. Can't have all those cute ingredients gunking up the bottom can we?

I purchased really cute custom labels from Say It on the Wall, since I have yet to get my Silhouette Cameo. Anyone listening and wish to purchase one for me, my birthday is in 2 1/2 weeks! :o) You will also need your favorite music like my Glee station on Pandora Radio.


It is really easy to put vinyl on anything. First, rub with all your might, or a Petco gift card so that the vinyl sticks to the transfer paper. Then slowly at an angle peel the vinyl off the backing.

Situate the vinyl and transfer paper combo to the glass jar. 
Press with fingers on top of the vinyl. Then slowly, very slowly peel the transfer paper off, pressing the vinyl down if/when needed.
I pressed down on the vinyl again after the transfer paper was off just to make sure it stayed down and was secure.

Then just fill with your favorite ingredients and place somewhere really cute.
The orange scoops are freebies I've gotten from Tupperware parties. They don't measure but they are great for filling a measuring cup or just dumping things in. I never always measure  my rice, don't you?


Hope this little tutorial helps and happy vinyling. :o) That's a word right? Ha Ha. Tip Junkie handmade projects

LinkWithin

Related Posts Plugin for WordPress, Blogger...